| Prerequisites for MapImagery MapInfo Professional 5.0, 5.5 or later is required. Note that the 32 bit
version is required.
Up until (and including) version 6.030 of MapImagery, MapInfo Professional 4.x was
supported. After this version it became too difficult to maintain backward compatibility.
If you are still using MapInfo 4.x, your best option is to upgrade to one of the 5.x
versions of MapInfo. If this is not possible, then you could try and use version 6.030 of
MapImagery, however, this version is not being actively maintained.
Windows95, Windows 98, WindowsNT 3.51, WindowsNT 4.0 or later is required.
Note that the link is for PC platforms only. It doesn't work with any of the UNIX
versions of MapInfo.
Note also that ER Mapper is no longer a prerequisite for the link. This
contrasts with previous versions.
Standard Installation
MapImagery is
distributed as a self extracting executable archive. All you need to do is download this
file to your PC and execute the file.
Answer the questions that the install program asks you. No further configuration is
required, however, you may wish to change some of the optional parameters that control the
way that the link operates. This can be done at any time via the menu Options for
MapImagery.
MapInfo MapX Control Installation
To work with MapInfo MapX based applications, specify the MapInfo
MapX\Program directory as the MapInfo directory, when prompted by the
InstallSheild program.
It should be possible for MapInfo Professional and MapInfo MapX applications to coexist
on the same machine, although you may have to install one time for each application, so
that the appropriate raster translators and dll files are present in each of the MapInfo
application directories.
To view a MapImagery raster layer in your MapInfo MapX based application, you should
first create a .tab file (and associated .alg and .ers files) in MapImagery. You should
then be able to load the layer as a standard raster MapInfo table.
Network Drive Installation
Some support has been added for large sites that want to
install MapImagery centrally on a network drive, exported to users PCs.
The most important thing to do for network support is to install MapImagery into a
parent directory of the MapInfo application directory. This enables the MapImagery system
libraries and configuration files to be located automatically when a new user uses
MapImagery for the first time.
The program attempts to locate the MapImagery directory by recursively searching
sub-directories of parent directories of the currently running MapInfo application. The
following search order is used:
..\MapImagery
..\GID\MapImagery
..\Program Files\GID\MapImagery
..\..\MapImagery
..\..\GID\MapImagery
..\..\Program Files\GID\MapImagery
..\..\..\MapImagery
All other registry entries are set to factory defaults, the first time that a user runs
MapImagery. Note that these settings may not be optimal for operation of the program.
It should be possible to run MapImagery from a READONLY drive, as the default for the
Projection Database Directory has been changed to be the users home directory, rather than
the MapInfo directory.
Directories Link Options
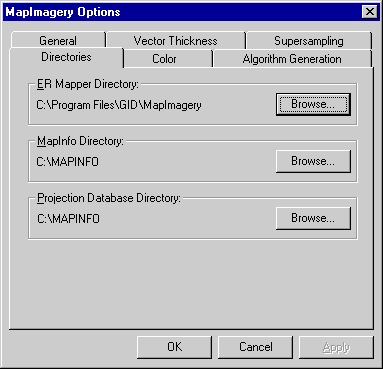
ER Mapper Directory
This is the directory that ER Mapper is installed. You
are prompted for this directory during installation of MapImagery. This option can be changed at any time
via this options dialog.
MapInfo Directory
This is the directory that MapInfo is installed. You can
use this option to switch between different versions of the MapInfo system software,
however, because the MapImagery install program writes some files into the MapInfo directory, you must install
the link into each of the MapInfo directories that you intend to switch between.
Projection Database Directory
This is the directory in which a database file ermmi.prj
is written. In this file, MapImagery saves away the choice that you make in the Projection dialog, for future use. The
next time that you try to load an algorithm with the same ER Mapper projection details,
the projection dialog will remember the MapInfo Category, Category Member, and Units that
you entered, and fill in these values for you. If you have several users of the link at
your site, you may wish to put this file on a central file server, so that people can
share the choices that other users have made, matching ER Mapper projection details with
MapInfo ones.
Color Link Options
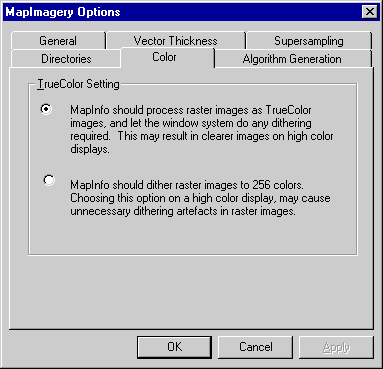
TrueColor Setting
By default, when MapInfo displays raster imagery on a
high color display, the number of colors is reduced down to 256 via dithering. This can
result in unnecessary dithering artifacts appearing in the image.
Setting the above option tells MapInfo to process raster images as TrueColor (24bit)
images, and to let the window system do any dithering required to display the image on
your screen. This can result in much clearer images where your video card supports 16bit
or 24 bit color.
Algorithm Generation Link Options
These options control some of the features of the ER Mapper
algorithms that are generated when you choose Open Image
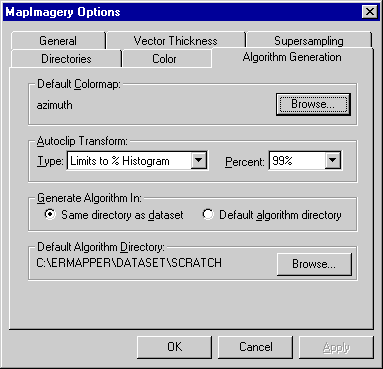
Default Colormap
This is the colormap that is used when an algorithm is
generated to display an ER Mapper image 1 or 2 bands. The default is greyscale, but you
can choose any valid ER Mapper colormap that you like.
Autoclip Transform Type
This is the type of autoclip to do on algorithm layers
when an algorithm is generated to display an ER Mapper image the present release, the only
option is Limits to % Histogram which sets the input limits of a layer to a
given percentage of the input histogram. This histogram is calculated by running the
algorithm at a low resolution. More information on ER Mapper transforms and histograms can
be found in the ER Mapper documentation.
Autoclip Percent
This option is used to vary the percentage used when an
autoclip is done to generate an algorithm to display an ER Mapper image
Generate Algorithm In
This is the directory to generate the algorithm in. The
default is the same directory as the image choosing Default algorithm directory
causes the algorithm to be saved in an alternative directory. This may be useful if your
image is on a read only file system.
Default Algorithm Directory
This directory is used as the location for generating
algorithms, when the Generate Algorithm In option is set to Default
algorithm directory.
General Link Options
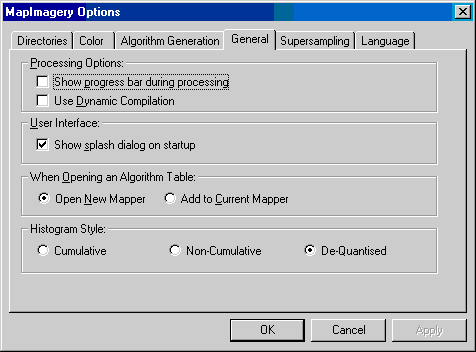
Show progress bar during processing
The link normally displays a progress bar at the bottom
of the main MapInfo window, when processing an algorithm. This option allows this feature
to be disabled.
Show splash dialog on startup
This option allows the MapImagery splash dialog, which appears when MapInfo
is started up to be disabled.
When Opening an Algorithm Table
This option controls what happens when you open a new
algorithm or image table. The default is to open a new MapInfo mapper. Choose Add to
Current Mapper to make the link add the new raster table to the current mapper.
Histogram Style
This option controls the histogram style displayed in the
Transform Dialog. You can choose between Cumulative (the default),
Non-Cumulative, and De-Quantised.
Supersampling Link Options
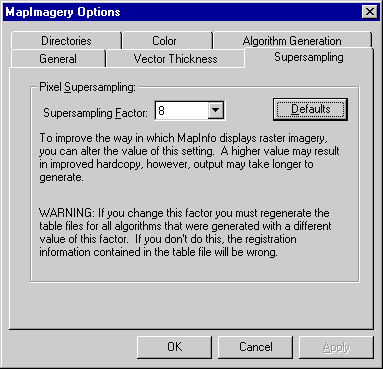
Pixel Supersampling Factor
This factor allows you to control how much to supersample
each raster pixel. This is useful for two purposes:
To avoid a problem that MapInfo has with printing raster images to hard
copy devices. The problem is that MapInfo dithers at raster image resolution,
rather than at hardcopy device resolution. Setting the factor to a higher
value, tells MapInfo that that raster image resolution is higher, resulting
in better dithering on hardcopy devices. Setting the factor too high may result in slower
display of raster data and use of more memory.
To allow you to control over how smooth ER Mapper vector layers appear. A
higher value for this factor results in smoother ER Mapper vectors, but may result in
slower display of raster images. A lower value results in vectors with courser features,
but may result in faster display of raster images.
|